Because nobody wants a droopy bow tie.
BECAUSE NOBODY LIKES A DROOPY BOW TIE
Words: C. Stewart
There are some menswear purists who look down on pre-tied bow ties, insisting the traditional (and fiddly) self-tie kind are the only way to go. Truthfully, we think you’re better spending less time mucking about in front of the mirror trying to get your bow tie perfect, and more time enjoying yourself.
But even though it’s pre-tied, you’re still going to have to adjust it to fit your neck. Here’s how it’s done.

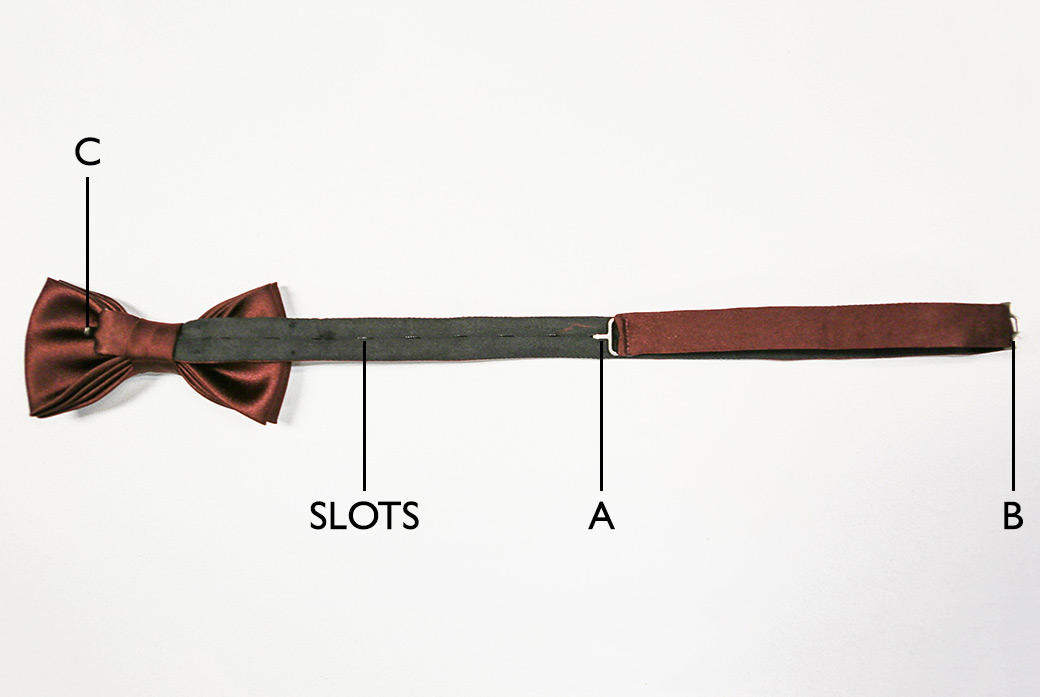
First up, a brief intro on all the parts of your bow tie. Clip A is a T-shaped bar at the end of the strap that goes into the slots on the back to adjust the fit. Clip B is a movable bar on the strap that you’ll connect to clip C, a hook on the back of the bow itself.

A step by step to fitting your bow tie
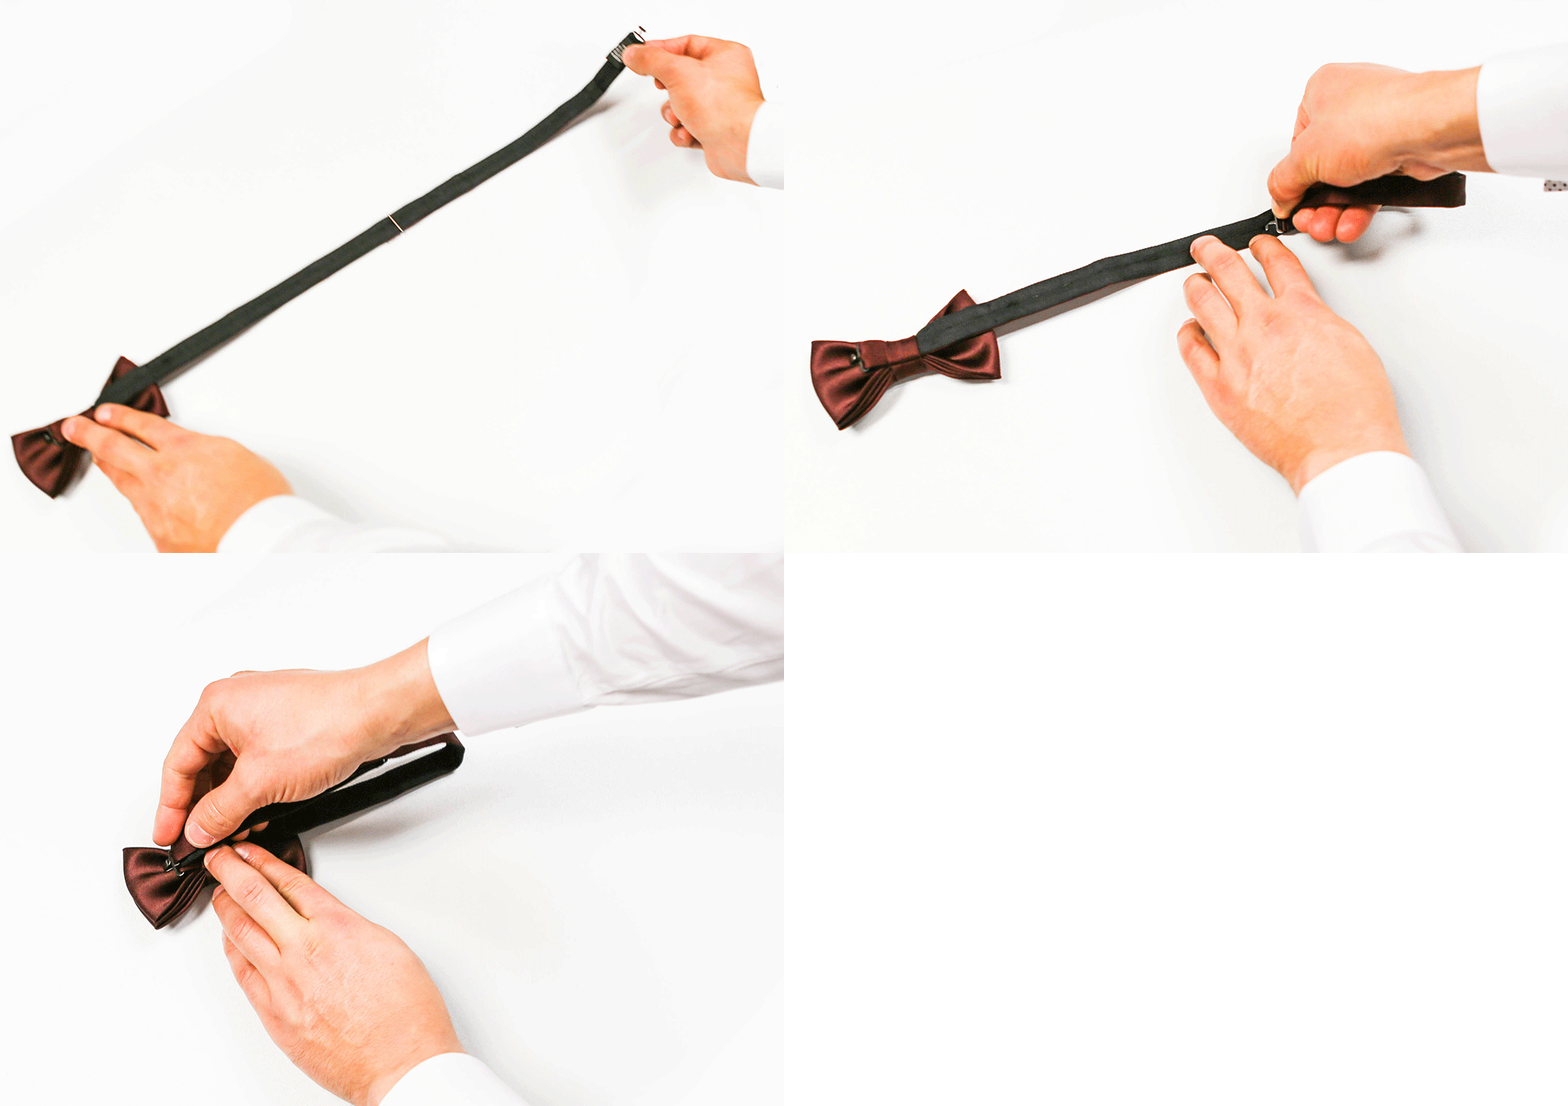
1. Take clip A and fold the bow tie’s strap back on itself to a length that will fit snugly around your neck, with clip B at the end
2. Fix the length by sliding clip A into one of the slots on the back of the strap
3. Hook clip B onto clip C to secure your bow tie. If it’s too loose or tight, move clip A into a neighbouring slot to adjust the fit
Once your bow tie’s on, adjust its sides and plump them out a little. A flat bow tie is a sure giveaway that it’s pre-tied. There’s no shame in a pre-tied bow tie but a little artful illusion never hurt anyone.


